Introduction
If you have ever scrolled through TikTok, Instagram Reels, or YouTube Shorts and wondered, “How on earth did they do that?” you are not alone. I remember the first time I tried to edit a travel vlog on my phone. I had great footage—beautiful sunsets, busy streets, cool cars—but when I put it all together, it looked… boring. It looked like a PowerPoint presentation of video clips. It lacked energy. It lacked soul.
That is when I discovered the magic of effects. Not the cheesy star wipes from the 90s, but the modern, dynamic movements that keep viewers glued to the screen. And the best part? You don’t need a $2,000 computer or expensive software like Adobe Premiere Pro. You can do it all on your phone with the VN Video Editor effects.
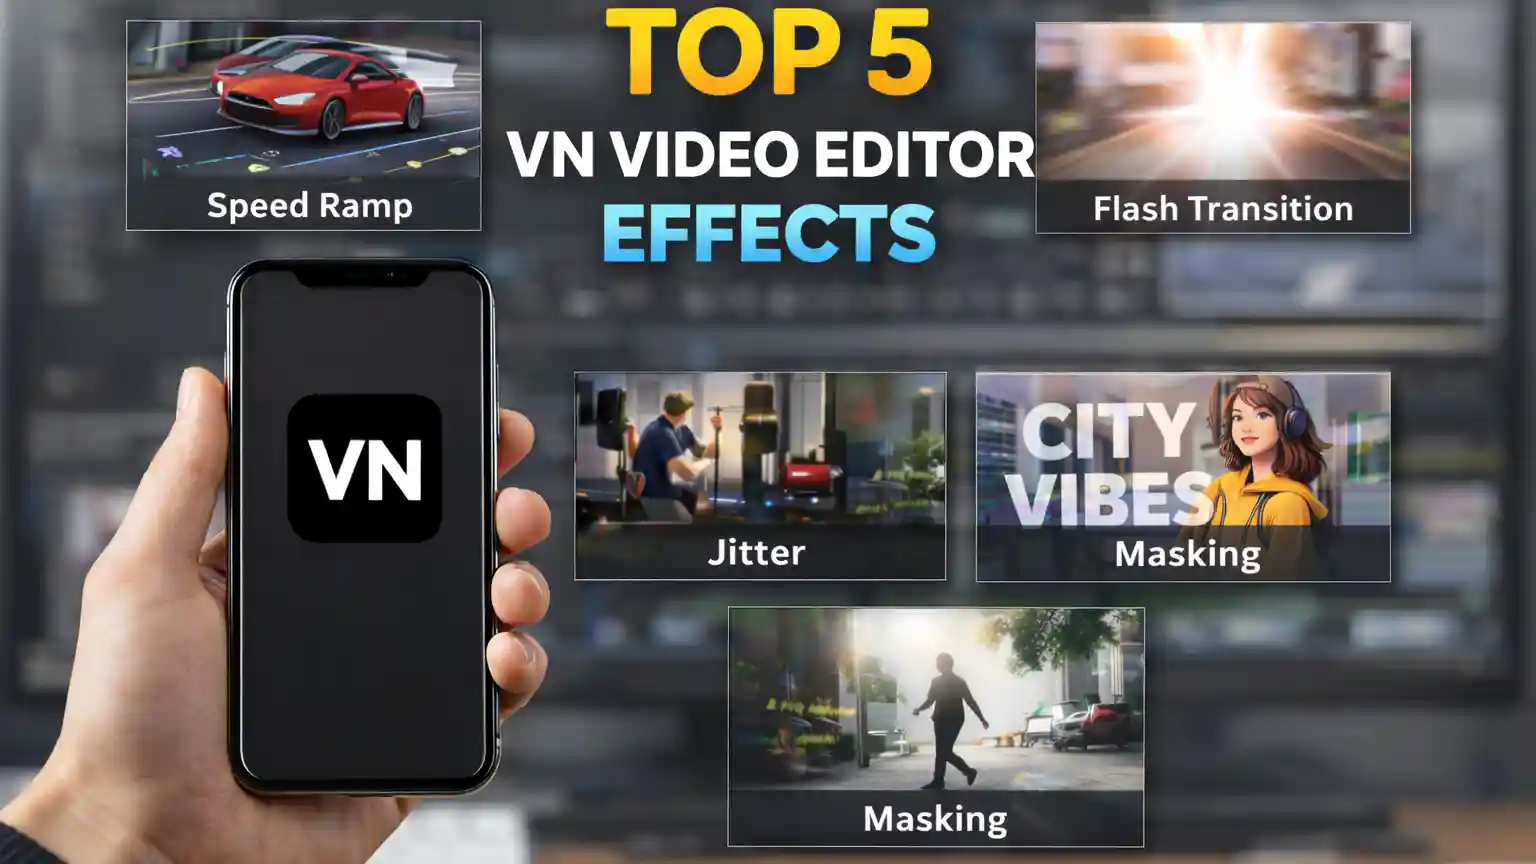
In this article, I am going to walk you through the 5 absolute best effects in VN Video Editor that can transform your raw footage into a viral masterpiece. I will write this just like I’m sitting next to you, holding my phone, showing you exactly where to tap.
We are going to cover everything from speed ramping to masking, and I promise to keep it simple. Let’s dive in.
Why VN Video Editor? A Quick Personal Take
Before we get into the specific effects, I have to explain why I love VN Video Editor so much. When I first started creating content, I was broke. I couldn’t afford monthly subscriptions. I tried so many apps—Kinemaster (the watermark was annoying), CapCut (great, but some features are banned in certain regions or require a VPN), and InShot (good for basics, bad for advanced stuff).
VN Video Editor was a game-changer. It’s often called “Mobile Premiere Pro” because it gives you multi-track editing without the complexity. Plus, it’s largely free and doesn’t slap a giant ugly watermark on your hard work.
The VN Video Editor effects we are going to discuss today are powerful because they are manual. They aren’t just “click and apply” filters that look generic. They allow you to tweak settings, meaning your video will look unique, not like a template everyone else is using.
1. The “Speed Ramp” (Curve Speeding)
If there is only one effect you learn from this entire article, let it be this one. Speed Ramping is the difference between a home video and a cinematic vlog.
What is it?
Imagine a video of a skateboarder. Standard editing plays the clip at normal speed. Boring. Speed ramping plays the approach fast, slows down heavily right at the jump (the climax), and then speeds up again as they land. It manipulates time to focus the viewer’s eye on the most important moment.
My Experience with Speed Ramping
I used to just use the standard “Speed” slider. I would set a clip to 0.5x (slow motion). The problem? The whole clip was slow. It dragged on. The viewer got bored waiting for the action. When I switched to using the Curve tool in VN, my engagement went up instantly. It adds rhythm.
How to Create It in VN
- Import your clip: Ideally, something with movement (walking, running, a car driving, water pouring).
- Tap the “Speed” icon: It looks like a speedometer.
- Choose “Curve”: Do not use “Regular.” Regular is for amateurs!
- Manipulate the dots: You will see a line with several dots (keyframes).
- Pull a dot UP to make the video faster.
- Pull a dot DOWN to make it slower.
- The Viral Formula: For a standard cool shot, make the beginning fast (high dot), the middle very slow (low dot), and the end fast again (high dot). It creates a “Whoosh… slooooow… whoosh” effect.
Practical Tip
The VN Video Editor effects library handles speed well, but your footage matters. If you shot your video at 30fps (frames per second) and you try to slow it down to 10%, it will look choppy and laggy.
- Pro Rule: If you plan to speed ramp (slow down), shoot your video in 60fps using your phone’s camera settings. This ensures the slow-motion part looks buttery smooth.
2. The “Jitter” Effect (Adding Impact)
Have you ever watched a music video where the screen seems to vibrate every time the drum kicks? That is the Jitter effect. It creates a physical reaction in the viewer. It wakes them up.
Why It Works
Social media is a battle for attention. If a video is too smooth, the brain relaxes and gets distracted. A sudden shake or jitter re-engages the brain. It says, “Hey! Look at this!”
Real-Life Application
I recently edited a gym video for a friend. He was doing a heavy deadlift. The lift was slow and impressive, but the video felt flat. I added a “Jitter” effect exactly at the moment the barbell hit the floor with a thud. Suddenly, the viewer could feel the weight. It transformed a simple workout clip into a “hype” video.
Step-by-Step Guide
- Find the Beat: Listen to your music. Find the heavy bass drop or the snare hit.
- Split the Clip: Use the “Split” tool (scissor icon) right at the start of that beat.
- Open the FX Menu: Tap on the “FX” icon in the bottom toolbar. This is where many pre-made VN Video Editor effects live.
- Select “Jitter Down” or “Shake”: There are a few options. “Jitter Down” usually looks the most professional for beats.
- Adjust Duration: This is crucial. By default, VN might make the effect last 1 second. That is too long! It looks like an earthquake. Drag the slider to make it very short—about 0.2 to 0.4 seconds. It should be a quick pulse, not a seizure.
Warning
Do not overuse this. If you put a jitter on every single beat of the song, your viewer will get motion sickness and scroll away. Use it only for the biggest moments—the drop, the impact, the transition.
3. Keyframe Zoom (The Fake Camera Operator)
This is my secret weapon for talking-head videos or product reviews.
The Problem
You are filming yourself talking to the camera. You have your phone on a tripod. The video is static. You talk for 60 seconds without moving. The audience gets bored because nothing is changing visually.
The Solution: Keyframes
Keyframes allow you to add movement to a video that was filmed completely still. You can make the camera slowly zoom in on your face while you are talking, or pan across a product photo.

Understanding Keyframes (The “Rubber Band” Analogy)
Think of a keyframe as a thumbtack on a rubber band.
- You put a tack (Keyframe 1) at the start of the clip where the video is normal.
- You put a tack (Keyframe 2) at the end of the clip, and you pinch the screen to zoom in.
- VN Editor acts like the rubber band, smoothly stretching the movement between those two points.
How to Execute the “Dynamic Zoom”
- Select your clip.
- Tap the “Keyframe” button: It is a small diamond icon with a plus (+) sign, usually near the play button.
- Add the first keyframe: Go to the start of the clip. Tap the diamond. You will see a small red diamond appear on the timeline. Don’t touch the screen yet.
- Add the second keyframe: Scroll to the end of the clip (or where you want the zoom to stop).
- Pinch to Zoom: Now, use two fingers on the preview screen and zoom in slightly on the subject. VN automatically adds the second keyframe.
- Play it back: You will see the video slowly creeping inward.
This subtle movement makes your video feel “alive.” It is one of the most underrated VN Video Editor effects because it doesn’t look like an effect; it looks like high production value.
4. The Flash Transition (Hiding the Cut)
Transitions can be tricky. Beginners love “Cube Spin” or “Dissolve” or “Pixelate.” Trust me, avoid those. They look cheap. They scream “I just started editing yesterday.”
The most viral videos use transitions that you barely notice. The “Flash” (or White Blink) is perfect for high-energy content like travel, sports, or fashion.
The Concept
A “Flash” transition hits the viewer with a bright frame of light right when the clip changes. This blinds the eye for a millisecond, making the jump from one location to another feel seamless.
How to Add a Flash in VN
There are two ways to do this, and knowing both makes you a better editor.
Method A: The Transition Button (Easy)
- Look at the timeline between two clips. You will see a small square with a
+inside. - Tap the
+. - Select the “Matte” category.
- Choose “White” or “Black.”
- Set the duration to 0.2s. (Fast is key!)
Method B: The FX Trick (Advanced) I prefer this method because it looks more organic.
- Go to the start of the second clip.
- Tap the FX button.
- Scroll to find “Flash White” or “Flash Black.”
- Apply it to the very beginning of the clip.
Why I Prefer Method B
When you use the FX tool, the flash happens on the beat of the new clip. It feels punchier. Using the transition button sometimes messes up the timing of the audio.
This is one of those VN Video Editor effects that creates a “blink and you’ll miss it” vibe. It keeps the energy high without distracting the viewer with a spinning screen.
5. Text Behind Object (The Masking Magic)
This is the effect that makes people stop scrolling and ask in the comments, “What app did you use??” It looks like 3D magic, but it’s actually a simple layering trick.
The Visual
Imagine a video of you walking down the street. The text “CITY VIBES” appears on the screen, but your body walks in front of the text, blocking parts of the letters. It makes the text look like it is physically part of the environment, floating in the air behind you.
How It Works (The Sandwich Theory)
Think of your timeline like a sandwich.
- Bottom Bun: Your original background video.
- Meat/Cheese: The Text layer.
- Top Bun: A copy of the original video with the background removed (so only you are visible).
Because the “Top Bun” (You) is on top of the “Meat” (Text), you cover the text.
Step-by-Step Tutorial
- Place your main video on the main track.
- Add your Text: Write your title and place it nicely in the center. Make it big.
- Add the Overlay: Tap the “PIP” (Picture in Picture) or “Add Sticker/Video” button above the main track. Select the exact same video clip you used for the background.
- Fit to Screen: Make sure the overlay video fits perfectly over the background video. (Use the “Fill” or “Fit” button).
- Remove Background: Tap on the overlay video clip. Scroll the bottom menu until you find “Chroma” (if you used a green screen) or “Remove BG” (auto-removal).
- Note: The auto-removal works best on videos with good lighting and a distinct subject.
- The Result: VN will cut out your body from the overlay. Since this overlay is on the top layer, your body will cover the text, but the background (which was removed) will be transparent, revealing the text behind you.
This is one of the most sophisticated VN Video Editor effects available. It used to take hours in Adobe After Effects to rotoscope this. Now, you can do it in 30 seconds on your phone while waiting for the bus.
Combining Effects for Maximum Viral Potential
Now that you know the top 5 effects, the real magic happens when you combine them. You don’t just use salt or pepper; you use both to make a meal tasty.
The “Power Combo” Recipe: Imagine you are editing a car video or a cooking reveal.
- Start with a Speed Ramp: Fast approach to the car/dish, slowing down right as you get close.
- Add a Jitter: Right when the speed ramp hits the slowest, coolest point (and the bass drops), add a tiny Jitter effect.
- Keyframe Zoom: While the clip is in slow motion, add a slow Keyframe Zoom to pull the viewer closer to the detail (the badge of the car, the steam of the food).
- Flash Transition: When cutting to the next angle, use a white flash to keep the energy up.
Using these VN Video Editor effects in harmony is what separates the pros from the beginners.

Common Mistakes Beginners Make (Avoid These!)
I learned these the hard way, so you don’t have to.
1. Overusing Effects Just because you can add a shake, a flash, and a zoom to every clip doesn’t mean you should. If everything is special, nothing is special. Effects are like spices—too much ruins the dish. Use them to highlight key moments.
2. Ignoring Audio Visual effects must match the audio. A “Speed Ramp” looks awkward if the music is a steady, flat beat. A “Jitter” looks like a mistake if there is no drum hit to match it. Always edit your music first, then match the video to the audio.
3. Bad Lighting The “Remove BG” tool (for the Text Behind Object effect) struggles in low light. If your video is grainy or dark, VN won’t be able to separate you from the background clearly. Good lighting makes every effect look 10x better.
4. Wrong Aspect Ratio Before you start applying keyframes, make sure you selected the right canvas size (9:16 for TikTok/Reels, 16:9 for YouTube). If you edit in widescreen and then crop it for TikTok later, your careful keyframe zooms might get cut off.
Conclusion: It’s About the Story, Not Just the Flash
We have covered a lot of ground here. We talked about the Speed Ramp for cinematic flow, the Jitter for impact, Keyframes for dynamic movement, the Flash for seamless transitions, and the Text Behind Object trick for that professional 3D look.
These VN Video Editor effects are powerful tools. They can make your content look high-quality and professional. But remember this: Effects are there to enhance the story, not replace it.
When I look back at my most successful videos—the ones that got the most views and the best comments—it wasn’t just because I used a cool transition. It was because the video had a point. The effect just helped deliver that point more effectively.
So, download VN (it’s free, so you have no excuse!), grab some old footage from your camera roll, and just start playing. Don’t try to be perfect on your first try. My first attempt at a speed ramp looked terrible. My first masking attempt chopped off my head. That’s part of the process.
The more you play with these VN Video Editor effects, the more natural they will become to your workflow. Soon, you won’t even have to think about it; you’ll just hear a song and instantly know, “Okay, I need a jitter here, a ramp there, and a flash cut at the end.”
Now, go create something awesome. Your viral hit is just one edit away.
Frequently Asked Questions (FAQs)
Q1. Does VN Video Editor leave a watermark on my video?
No, VN is one of the few free editors that does not stamp a watermark over your video. However, it does automatically add a “Directed by VN” slide at the very end of your timeline. You can simply tap on that end slide and hit “Delete” before you export.
Q2. Why is my video lagging when I try to play it back in the editor?
This happens if you layer too many effects (like Keyframes + Blurs + Overlays) at once, especially on older phones. Don’t worry—the lag usually only happens in the preview. Once you export the final video, it will play smoothly. To fix the preview lag, try changing the preview resolution to 720p or 1080p in settings.
Q3. Can I use these effects on both Android and iPhone?
Yes! The interface for VN Video Editor is almost identical on both iOS and Android. Whether you have a Samsung, Pixel, or iPhone, the icons for Speed Ramp, Keyframe, and FX are in the same locations.
Q4. Why isn’t the “Remove BG” working for the Text-Behind-Object effect?
The auto-background remover needs good contrast. If you are wearing a black shirt against a dark wall, the AI gets confused. For the best results, film yourself in good lighting with a background that is a different color than your clothes.
Q5. How do I make sure my effects line up perfectly with the music?
Before you start adding effects, tap on the music track in your timeline and select “Beats.” You can listen to the song and tap the red flag icon every time you hear a drum beat. This puts small markers on your timeline so you know exactly where to place your Jitter or Speed Ramp.
Contact Us
If you have any query please Click Here to contact us.